Previously published in the Spring 2007 AA-EVP NewsJournal
©David Mierzwinski – All Rights Reserved
Also see: A Simple Optical Microphone
 This article presents an experimental approach for making EVP recordings. Its purpose is instructional and to help promote an understanding of vibrational energy and how we may better perceive it.
I’m going to share with you a few simple techniques for recording lightwave vibrational energy. This is energy which is beyond what we may see and hear every day. A good example is a common household light bulb. You see the light and can feel the heat produced by it; however, you cannot hear that the bulb is being modulated by the 60 Hz line current. You may be surprised at the amount of “sound” that is silent to us, some man made and some perhaps not.
 The technique involves use of a single, widely available electronic component called a phototransistor. This is not the same as a diode which was used by early EVP researchers. The phototransistor I recommend is available at any Radio Shack store or available from them online. The part number is 276-145. My tests have shown that the device is responsive to infrared, visible and ultraviolet light. All of these frequencies of light mentioned are well above radio broadcast, cell and microwave transmission frequencies.
You can make a simple plug-in phototransistor adapter for your digital recorder. All popular digital recorders I am aware of use internal electret microphones. With these recorders you can use the external microphone jack. The recorder will provide the small voltage the phototransistor requires to operate at the external microphone jack. The 1/8” phone plug common to most recorders is Radio Shack part number 274-286.
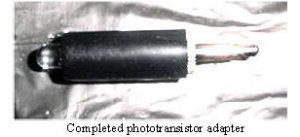
 Solder the phototransistor to the phone plug as follows: The phototransistor has a flat edge on its case, this is the collector mark. The remaining lead is called the emitter; Connect (solder) the collector to the short pin of the phone plug; and, the emitter connects to the long pin of the phone plug. The photo shows the completed assembly ready for use.
Plug the completed adapter assembly into the external microphone jack of your portable digital recorder and start exploring. Try recording various light or even heat sources; you can unplug the adapter at any time and make a verbal notation of the source. Plug it back in and continue. You will hear different sounds when you record various sources like candles, light bulbs, computer monitor screens, TV sets, remote controls or a fireplace.
 For example, a quartz-tube space heater at full power (glowing) will produce a very pure thermal white noise. Place the recorder in your car and drive around. You may be surprised at what you can hear in the filtered sunshine as the levels of light change as you drive. If you have a crystal or mineral collection you may try recording reflections or direct light shined through a crystal (sunshine, LED flashlight or a laser pointer works well).
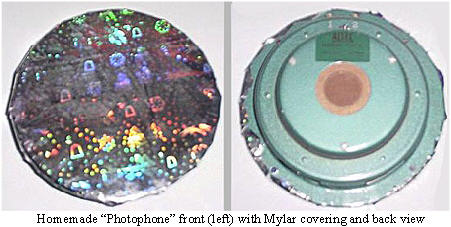
Would you like to hear your own voice through the vibration of light? Here is a simple device you can make for a number of interesting experiments. It is based on A.G. Bell’s Photophone invented around 1880. For my model, I used some reflective, shiny, very thin, gift wrapping plastic (like a Mylar or Saran plastic). I taped this film very tightly (like a drum) over the front of an old eight-inch diameter audio loudspeaker.
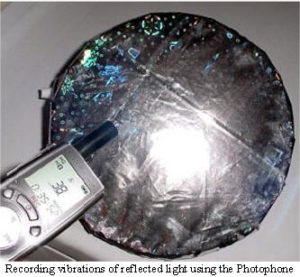
 Hold the completed Photophone so sunlight reflected from the surface of the shiny, flexible mirror shines on the phototransistor. Now speak closely and loudly to the surface of the Photophone. On playback you should hear your own voice. The quality will depend on how well your voice vibrates the surface of the Photophone. For more controlled experiments, you can connect the loudspeaker to a stereo or amplifier and play different sounds through it to vibrate the film. Just place the speaker so that sunlight reflects from the surface to the phototransistor. Try using music, Spiricom tones, babble or even white noise, as an example.
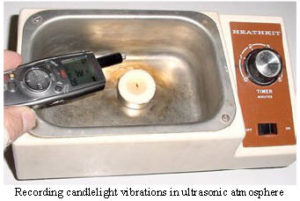
Another technique is to provide external vibration to a light source and record the result. Pictured is a small tea candle placed in the well of an ultrasonic cleaner. The candle is in a small amount of water, lit and the cleaner turned on in a darkened room. The recorder is held clear of the cleaner and pointed at the candle which flickers at a very high rate in this atmosphere.
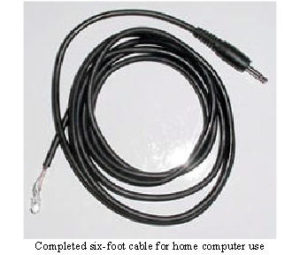 You may wish to build a phototransistor cable that can be used with your home computer sound card for recording. The Radio Shack part number of the cable to use is 42-2434. The six-foot cable has a molded 1/8” plug on one end and tinned leads on the other end, ready to connect the phototransistor. The connections are as follows: inner conductor of cable connects to phototransistor collector (flat edge), outer (shield) connects to emitter.
An interesting experiment that has yielded good results has been the optical microphone. The optical microphone is a commonly available oil lamp. The only oil lamp style that has worked so far has been a lamp with a three-fourths inch wide wick. The wick that comes with 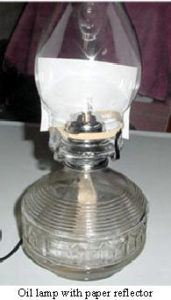 these lamps is cotton and works well. I have begun tests with other wick materials as of this writing. I attach the phototransistor and cable assembly to the lamp with a thick rubber band. A reflector is required to be placed behind the phototransistor. A white 3 x 5-file card is excellent for this purpose. This simple reflector greatly increases the gain of the microphone. If your sound card allows audio monitoring, you can experiment with the flame level for best reproduction of your voice. A high flame level can overload the phototransistor. Start with a low flame and ratchet it up slowly. Speak into the chimney of the lamp or across its top if you are sensitive to the exhaust fumes. Use an ultra-pure liquid paraffin lamp fuel for lowest odor.
Have fun exploring the under-researched areas of light energy vibrations with these unique recording techniques.
![]()

So what has been recorded using this, as far as Spirit Voices go. Im quite interested in alternate inputs for Spirit Voice recordings
You will have to ask David. It has been a while and we are out of contact with him. As I remember, it was pretty choppy.
Many of these techniques are just novel ways of conditioning the noise to improve formation of the voice. Always compare these techniques to natural background sound recorded with an audio recorder. In this case, the photo diode is the sound side.
I have had some interesting results using this method recording candle flames and lights. It’s been a while since I experimented with a phototransistor like this, and I’m going to have another go at it. It’s well worth making one of these to experiment with.